引言
背景
从去年开始,一直在学习Meltdown攻击和Spectre攻击,包括攻击原理的学习、攻击的复现(在x86和ARM两种架构下复现)、利用符号执行(基于LLVM的KLEE)进行检测等。
Meltdown攻击是通过绕过CPU的权限检查机制,将内核态的数据读取到用户态,从而实现数据泄露。Spectre攻击是通过利用CPU的分支预测机制,让CPU错误预测执行,从而实现数据泄露。
这两种攻击都是通过利用CPU的特性来实现的,而gem5是一个CPU模拟器,并且提供了这两种攻击所利用到的乱序执行、分支预测特性以及Cache,因此理论上可以利用gem5来模拟这两种攻击。
主要工作
在查阅相关资料时,发现2021年的一篇文章[1],利用gem5模拟了Spectre攻击,因此决定在学习gem5的过程中对这篇论文进行复现。
主要工作:
- 复现论文”Reproducing Spectre Attack with gem5: How To Do It Right?”,尽管经过了一番努力,仍然没有配置成功;
- 利用gem5推荐的系统镜像运行并进行Spectre攻击的复现,这次系统引导成功,程序也可以运行,但是没有得到与论文中一样的结果;
- 利用X86架构的gem5模拟Spectre攻击,采用Spectre论文中的PoC。
(2023.4.11) 利用X86架构的gem5模拟器复现Spectre攻击
PoC地址[6]:https://spectreattack.com/spectre.pdf
配置脚本
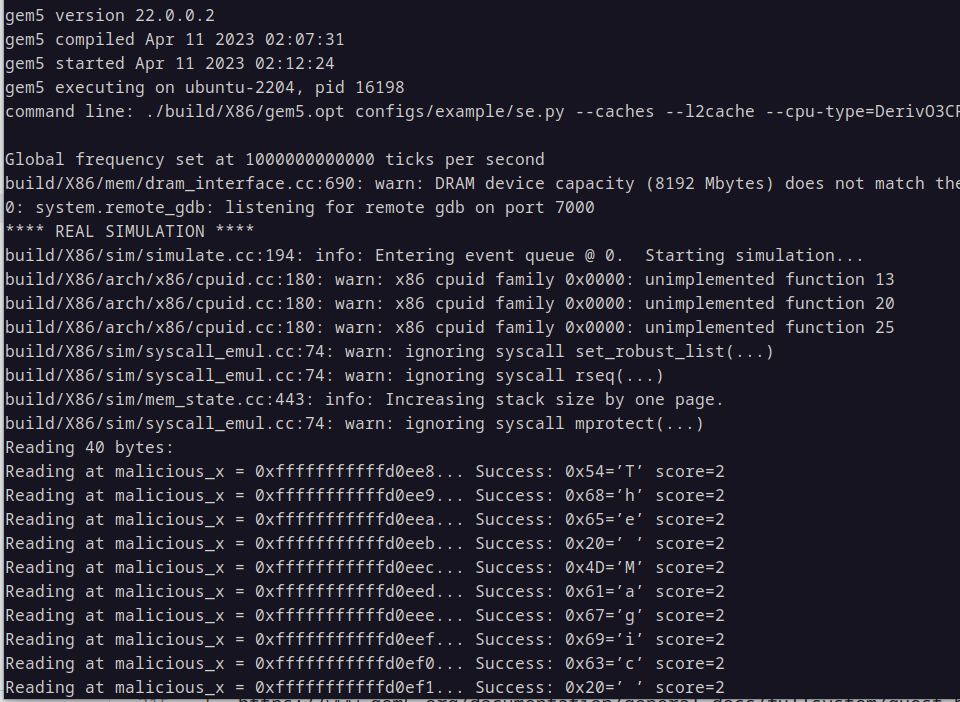
CPU类型为乱序执行的DerivO3CPU,使用LTAGE分支预测器。
1 | ./build/X86/gem5.opt --debug-flags=O3PipeView --debug-start=369832000 --debug-file=trace.out \ |
SE模式下运行结果
o3 pipeline
在gem5.opt添加参数–debug-flags=O3PipeView –debug-start=369832000 –debug-file=trace.out,可以在m5out文件夹下生成trace.out文件,该文件包含了CPU的执行轨迹,可以利用o3-pipeview.py脚本将其转换为可视化的o3 pipeline。
1 | ./util/o3-pipeview.py -c 1000 -o pipeview.out --color m5out/trace.out |
在1GHz下,每个周期的Tick是1000(-c 1000),转化为可视化的o3 pipeline如下:

论文环境搭建:在ARM架构下复现Spectre攻击
本节的主要内容是复现论文”Reproducing Spectre Attack with gem5: How To Do It Right?”的环境配置。
编译gem5
编译ARM架构的gem5:
1 | $ scons build/ARM/gem5.opt -j5 |
编译m5term:
1 | $ cd util/term |
树莓派4B配置文件
从[3]中克隆代码到本地:
1 | $ git clone https://github.com/pierreay/reproduce-spectre-gem5.git |
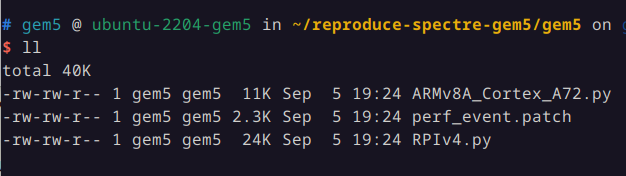
在gem5目录下有树莓派4和A72处理器核的配置文件:
操作系统和内核
下载系统和内核镜像文件:
1 | $ wget -O - http://dist.gem5.org/dist/current/arm/disks/linaro-minimal-aarch64.img.bz2 | bunzip2 > linaro-minimal-aarch64.img |
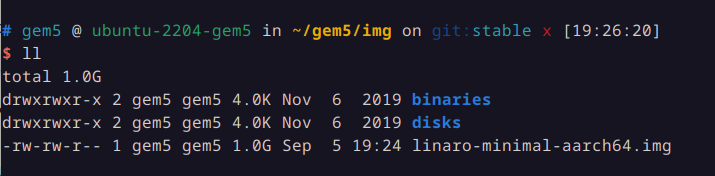
解压缩后的文件目录为:
创建工作镜像
接下来利用dd命令创建workload.img文件:
1 | $ dd if=/dev/zero of=workload.img count=200K |
创建一个回环设备以便将镜像文件作为块设备访问:
1 | $ dev=$(sudo losetup -f) |
创建分区表以及ext4文件系统:
1 | $ echo "," | sudo sfdisk $dev |

最后,从回环设备中卸载:
1 | $ sudo losetup -d $dev |
修改配置文件
这里如果直接按照[2]中执行,会遇到以下问题:
(1)没有将gem5的config添加到python的搜索路径中,会报找不到common的错误:
1 | ModuleNotFoundError: No module named 'common' |
因此,需要修改RPIv4.py文件,添加:
1 | sys.path.append("/home/gem5/gem5/configs/") |
(2)在gem5的commit中(5195c801156d1f9ff08d7ef4aceff2ff532c852),参数ArmITB和ArmDTB被统一换成了ArmTLB:
1 | arch-arm, configs: Remove ArmITB/ArmDTB |
因此,修改ARMv8A_Cortex_A72.py文件,将ArmITB和ArmDTB替换成ArmTLB:
1 | class ARM_A72_TLB_L1D(ArmTLB): |
(3)在gem5的commit中(6ecf110b06d7333aae13bcc16216cc127fdda7f0),flags_addr被移除:
同时,参考configs/example/arm/devices.py文件,将RPIv4.py中的对应代码去掉:
1 | # system.flags_addr = system.realview.realview_io.pio_addr + 0x30 |
(4)在gem5的commit中(5f95d7a89a56513876a7bb5dd8055d6b1d080c8b),IntrControl被移除:
1 | cpu: IntrControl, clear all and check helpers |
因此,直接将RPIv4.py中的以下代码注释掉:
1 | # system.intrctrl = IntrControl() |
(5)slave和master的接口变化:
修改RPIv4.py文件:
1 | # Wire up the system port to the previously created memory bus (gem5 |
修改A72.py文件:
1 | def connectCacheL2(self, bus): |
启动系统
首先,配置M5_PATH环境变量:
1 | $ export M5_PATH=$PWD/img/ |
接着,引导系统:
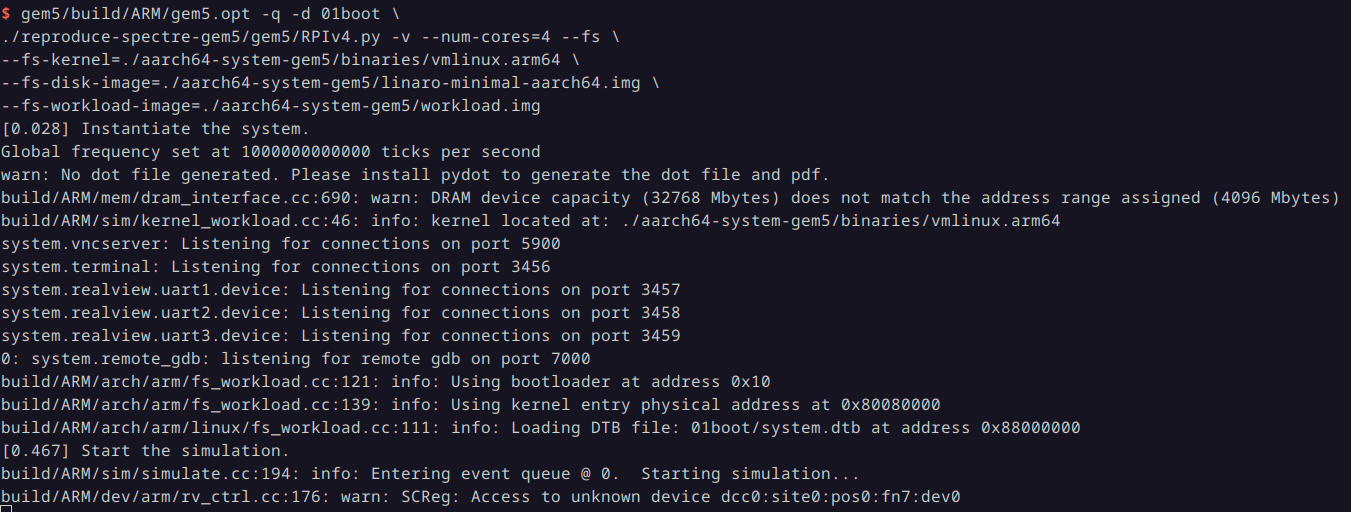
1 | $ build/ARM/gem5.opt -q -d 01boot \ |
引导过程如下:
然后,在另一个终端连接到m5term:
1 | $ util/term/m5term localhost 3456 |
但是这一步可能是因为版本的问题失败了。尽管终端的输出显示已经开始模拟,连接m5term也有输出和提示,但是没有拿到ARM模拟器的shell,也没有引导成功的说明。
gem5官方推荐ARM架构fs环境搭建
下载系统和内核
下载Linux系统和内核镜像文件:
1 | $ wget -O - http://dist.gem5.org/dist/v22-0/arm/aarch-system-20220707.tar.bz2 | tar xjv |
引导系统
引导系统:
1 | $ build/ARM/gem5.opt -q ./configs/example/fs.py --num-cpu=4 \ |
连接m5term:
1 | $ util/term/m5term localhost 3456 |
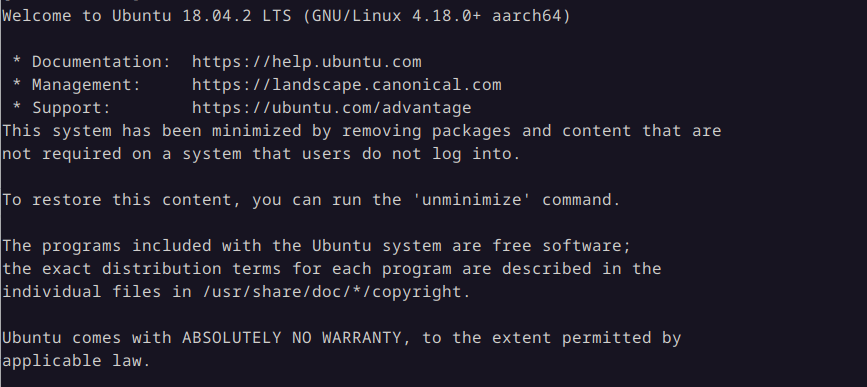
引导成功的截图如下:
挂载镜像
挂载disk镜像并写入攻击程序:
1 | $ mkdir -p disk |
执行Spectre攻击
执行攻击:
1 | $ cd spectre |
但是没有得到预期的结果,攻击失败,猜测应该是环境与论文中的不一致导致的。
参考文献
- Ayoub, P., & Maurice, C. (2021, April). Reproducing spectre attack with gem5: How to do it right?. In Proceedings of the 14th European Workshop on Systems Security (pp. 15-20).
- https://pierreay.github.io/reproduce-spectre-gem5/
- https://github.com/pierreay/reproduce-spectre-gem5
- https://github.com/gem5/gem5
- https://www.gem5.org/documentation/general_docs/fullsystem/guest_binaries
- Kocher, P., Horn, J., Fogh, A., Genkin, D., Gruss, D., Haas, W., … & Yarom, Y. (2019, May). Spectre Attacks: Exploiting Speculative Execution. In 2019 IEEE Symposium on Security and Privacy (SP) (pp. 1-19). IEEE.